5 SI Joint Stretches for Natural Pain Relief
Staying active and keeping your SI joint mobile is a key component of preventing SI joint pain and dysfunction. When your body is stagnant, SI joint pain becomes more prominent and may cause tightness, discomfort, and instability. However, incorporating a few SI joint stretches into your daily routine may help keep your SI joints limber, allowing for greater mobility. Furthermore, stretching is a great way to kick off the morning and wind down at night. If SI joint pain has been nagging you, try these five SI joint stretches below to potentially find relief.

What is the SI Joint?
The sacroiliac joint, also known as the SI joint, is the junction between the sacrum and the ilium bones in the pelvis. It plays a crucial role in transferring weight from the upper body to the legs, making it an important joint in maintaining proper posture and balance. These joints are located on both the left and right sides of the body, so it’s essential to stretch both joints when performing the following SI joint stretches. Additionally, the SI joint plays a crucial role in maintaining stability and absorbing shocks in the spine and pelvis. It also helps distribute the weight of the upper body when standing, sitting, walking, or jumping.
Symptoms of SI Joint Dysfunction
SI joint dysfunction occurs when the SI joint becomes inflamed, irritated, or misaligned. This condition may result in pain and discomfort, particularly in the lower back and hips. It is commonly caused by factors such as having arthritis, being pregnant, and having a traumatic injury. Understanding the symptoms of SI joint dysfunction is crucial in seeking proper treatment and managing pain. Below is a list of symptoms that may indicate SI joint dysfunction:
- Lower back and hip pain
- Difficulty standing or sitting for extended periods
- Discomfort while climbing stairs
- Pain while bending forward or twisting
- Numbness or tingling in the legs
- Limited range of motion in the hips and lower back
- Stiffness in the lower back and hips
- Leg instability
- Trouble sleeping
- Muscle tightness in your hips or buttocks
If you are experiencing any of these symptoms, consult with a healthcare provider for an accurate diagnosis and appropriate treatment plan.
Top 5 SI Joint Stretches
Now that you have a better understanding of the SI joint and SI joint dysfunction, let’s look at some SI joint stretches you can do to help prevent and manage SI joint pain. All of the SI joint stretches listed below may be done in the comfort of your own home and require no equipment. As with any exercise program, it is crucial to talk to your healthcare provider before starting any of these SI joint stretches.
1. Butterfly Stretch

The butterfly stretch is a great stretch for the SI joint, as well as the hips and inner thighs. This stretch helps increase mobility in these areas and may relieve pain and discomfort. When you do this SI joint stretch, focus on taking deep breaths and relaxing your glutes and lower back. To perform the butterfly stretch:
- Sit on the ground with the soles of your feet together
- Hold onto your feet and gently press your knees down toward the ground
- Hold the stretch for 30 seconds
- Repeat as needed
For a more intense stretch, lean forward while maintaining your posture. This stretch may also be done in a squatted position with your feet flat on the ground and your elbows pressed against the inner thighs.
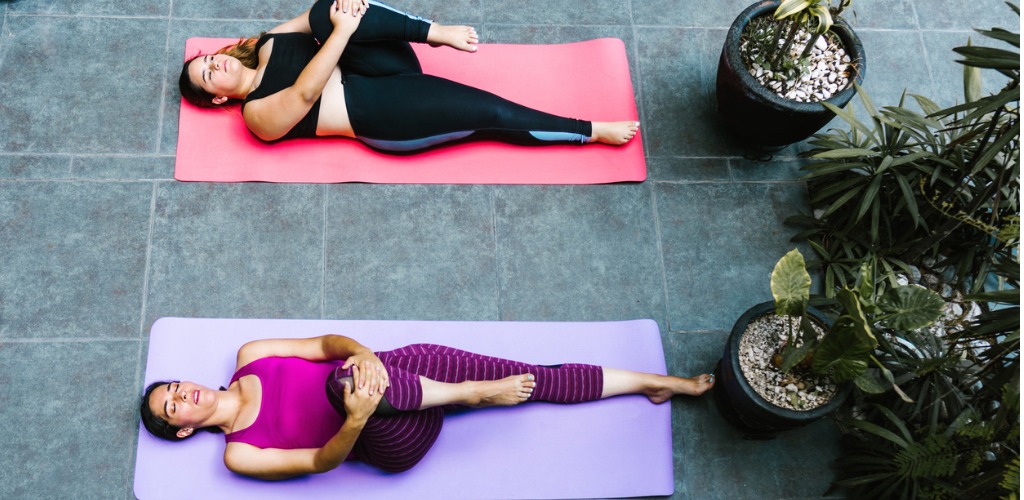
2. Knee-to-Chest Stretch

The knee-to-chest SI joint stretch targets the muscles in your lower back and aids in SI joint pain relief. This stretch may also reduce pressure on the spinal nerves and relieve tension in your hips. To do the knee-to-chest SI joint stretch:
- Lie on your back with your knees bent
- Bring one knee towards your chest and hold for 30 seconds
- Slowly bring your knee back to the starting position
- Repeat the same stretch with the other knee
- Do this for 2-3 sets
For an added challenge, you can pull both of your knees towards your chest at the same time. This SI joint stretch should be done slowly and with control. While you hold the stretch, focus on keeping your abs contracted. This will help you maintain the proper posture throughout the stretch.
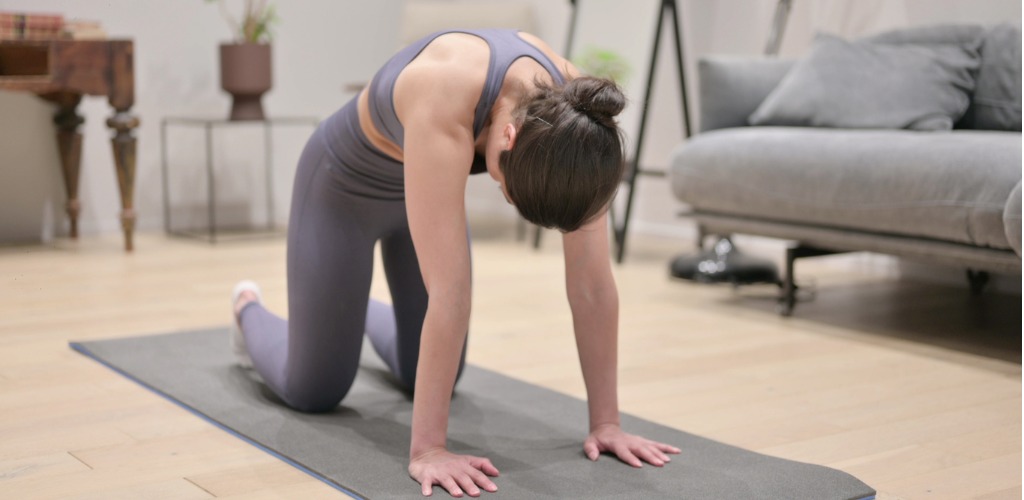
3. Cat-Cow Pose

This yoga pose helps bring flexibility to the spine and stretches the back, torso, and neck. Moreover, the Cat-Cow Pose promotes postural awareness by bringing the spine into alignment. The flow between the cat and cow poses also helps to relax the SI joint and reduce pain. To do the Cat-Cow Pose:
- Start on your hands and knees with your wrists under your shoulders and your knees under your hips
- As you inhale, arch your back and lift your tailbone toward the ceiling
- As you exhale, round your back and bring your chin to your chest
- Repeat for 10-15 breaths
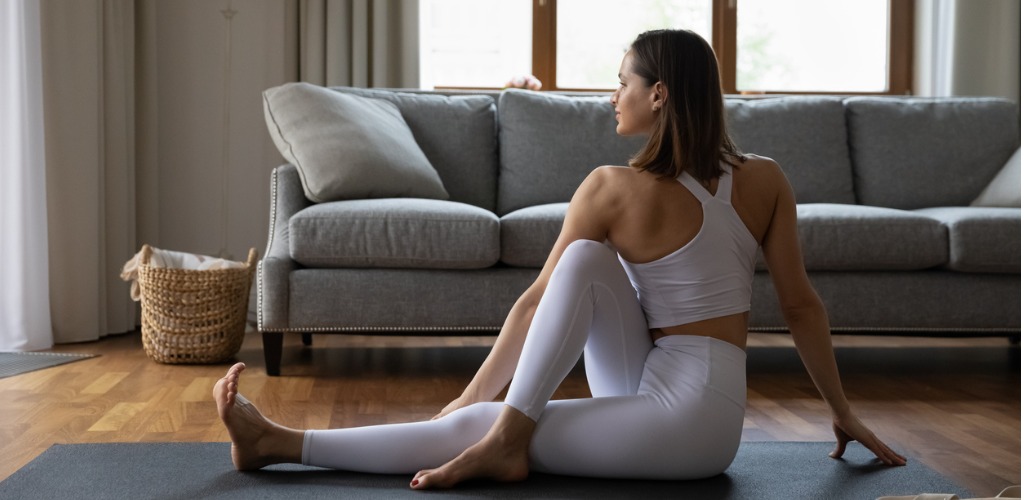
4. Half Lord of the Fishes Pose

This pose helps improve the flexibility of the spine, hips, and neck and relieves tension in the lower back, particularly around the sacroiliac joint. In addition, the Half Lord of the Fishes Pose strengthens your obliques and abs, helping build a strong core. To do this pose:
- Start by sitting on the floor with both legs stretched out in front of you, keeping the spine straight.
- Bend the right knee, bringing the right foot to the outside of the left knee.
- Place the right hand behind you on the floor, and cross the left elbow over the right knee.
- Exhale and twist your torso to the right, looking over your right shoulder.
- Hold the pose for 30 seconds to 1 minute, taking deep breaths.
- Release the twist, straighten your legs, and then repeat the pose on the other side.
As you do this stretch, keep your spine straight and avoid rounding your back during the twist. Be sure to move gently into this pose and never force yourself into an uncomfortable position. To modify this pose, you can use a yoga block or pillow to support your lower back.
5. Downward Facing Dog Pose

The Downward Facing Dog Pose is a popular yoga pose that helps stretch the back, hamstrings, and spine. It also works to strengthen the legs, arms, shoulders, and abdomen. A strong core is essential for a healthy SI joint as it helps keep the SI joints in alignment and reduces SI joint pain. To do the Downward Facing Dog Pose:
- Start on all fours, with your wrists under your shoulders and your knees under your hips
- Spread your fingers and press down through your hands and knuckles
- Lift your hips up and back, lengthening your spine
- Straighten your arms and legs, coming into an inverted “V” shape
- Press your hands and feet into the ground, and lengthen through your spine
- Relax your head and neck, and keep your gaze towards your belly button
- Hold the pose for 5 to 10 breaths
- To release, bend your knees and come back to the starting position on all fours
Explore a New SI Joint Pain Treatment by PainTEQ
While SI joint stretches may temporarily relieve SI joint pain, it’s vital to get to the root cause of SI joint dysfunction. That’s why many people are turning to the LinQ SI Joint Stabilization System by PainTEQ. This innovative procedure has been designed to treat SI joint pain and improve quality of life. To find a provider near you, contact us today.
For providers, partnering with PainTEQ offers an excellent opportunity to give your patients better outcomes and enhance your practice. With the LinQ SI Joint Stabilization System, you can provide an effective solution to SI joint dysfunction that may improve patient satisfaction and lead to more positive results. Contact PainTEQ and learn more about how we can help you expand your SI joint treatments.


